
Setting Up an Icom 7300 for 1300 Hz Tones

There has been so much confusion on how to set up an external transceiver so the DMX-40 or MMX in External Mode can receive the proper 1300 Hz signals, and still have the transmitter transmit on the correct frequency - the same frequency of the station that is being decoded.
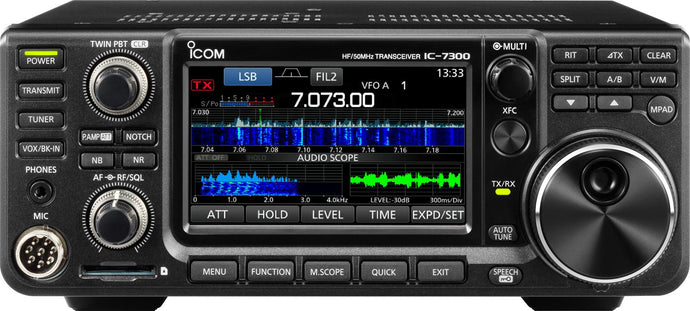
I don’t have a wall full of transceivers, as some folks do, I have only my trusty old Icom 7300. I say old, because I bought it when it first came out at $1500. I recognized even before it was on sale from the information made available that it was a breakthrough product, and I was right. What an amazing day in amateur radio history!
Step 1: Setting the CW PITCH

Anyway, let’s start out by first setting the CW PITCH or sidetone as high as it will go. To do this, go to CW mode, and then, using the Multi knob/button, press once for the display shown on the right. Touch CW PITCH to select. Turn the Multi knob until the value reaches 900 Hz. You should see something like the view on the right. Press Multi to save the value.
Now let’s consider what this setting is doing. For many, it is a mystery. Basically, to turn a carrier wave - which has no sound in itself - into a tone, we do this using a method called creating a beat frequency. A beat frequency is the difference frequency between two signals. So, if you have your dial set at 7.030.000, or 7,030,000 Hz, or 7.03 MHz, to get a 600 Hz beat frequency audio tone, you must use another frequency at 7.030.600. Note that 7.029.400, which is 600 Hz lower, will also generate a 600 Hz beat frequency tone. So in effect, this 600 Hz higher frequency is your VFO or receive frequency, and the displayed frequency is your transmitter frequency. Thought of in another way, a zero beat will occur 600 Hz higher on the dial, indicating that your receiver is, in effect, operating at 600 Hz higher in frequency than your transmitter, so you can hear the other station.
Thus, the CW PITCH control is an offset between your transmitter frequency and a VFO frequency generated within the transceiver. You can tune up or down, and this tone will go up and down depending on the distance between an incoming carrier and the VFO, which is offset from the displayed frequency by this setting, now 900 Hz. The displayed frequency is both your transmitter frequency AND the station’s frequency you are listening to,
For the DMX-40 or MMX receiver, the VFO frequency is the receive frequency, and it is the frequency we "insert" into the RF mixer to generate an audio signal. To receive 1300 Hz tones for a given frequency, we actually set the receiver frequency (VFO) 1300 Hz above the displayed frequency, and turn off the 1300 Hz offset when transmitting. We also have an RIT function that works in addition to that offset - just like the 7300. For the 7300, the internal workings are quite different, but the effect is the same, but limited to 900 Hz. We will add the extra 400 Hz later,
Step 2: Selecting a Filter
There are 3 built-in filters, and the one you are currently using is shown to the right of the blue CW button, top of screen. Here, we see FIL1, which is Filter 1. Pressing briefly switches between filters, but pressing and holding brings up the settings for the filter. Here, you see the effect of holding down FIL1 at the bottom of the screen, an area called FILTER (CW). Note that you can use any of the 3 filters for this purpose.

Note in the bottom left, the filter "center" is 900 Hz, as you have set in the CW PITCH, and the bandwidth in this example happens to be set to 1.5K, shown below FIL1 between the DEF button and SOFT button. That is 1500 Hz, and the filter is from 600 to 2100 Hz as shown on the left. SOFT is a good setting - SHARP will introduce too much ringing and other artifacts into the signal, interfering with the signal processing in the DMX-40 or MMX.
Step 3. Selecting Bandwidth Edit
Press the BW button to the left of FIL1, as shown below:

The BW button and the box below FIL1 will light up, and the label FIL1 will turn darker blue. This indicates that the filter bandwidth is ready to be adjusted.
Step 4: Adjust the Bandwidth of the Selected Filter
Using the main tuning knob, adjust the bandwidth so that the upper number is at least 1500 Hz, and better yet, 1700 Hz to give plenty of unfiltered content for the DMX-40 or MMX signal processor. Having a filter too tight can cause issues and reduce quality of the decode output.

Here, you can see we adjusted the bandwidth to 1.1K or 1100 Hz, resulting in a filter range of 600 to 1700 Hz. This should work nicely with the DMX-40 or MMX decoder.
Step 5: Adding 400 Hz to 900 Hz
You may have noticed that RIT was already set to 0.40, but the photo here shows you the setting again, top right on the waterfall display. Use the Multi knob to adjust this to 0.40, which is 0.4 KHz or 400 Hz.

Now what is actually happening when you set RIT to 400 Hz? It moves the receiving frequency up an additional 400 Hz from the transmitter and displayed frequency. Since the offset is already 900 Hz (generated by whatever means is used in the 7300), the tone for a tuned in signal that was at 900 Hz will rise to 1300 Hz - without touching the tuning knob! But the transmitting frequency, and the display frequency will stay the same. So no changes are needed between transmit and receive!
So just like the DMX-40 and MMX, the display frequency is ALWAYS the transmitter and other stations frequency, but adjustments are being made so the tone is heard at the appropriate frequency. If it is only your ears, it is set with the CW PITCH control. For PreppComm products, more than 900 Hz is needed, so we add in 400 more with RIT.
If you could turn off CW PITCH, or make it zero, then RIT would need to be 1.3, or 1300 Hz.
You don’t need to move the dial between receive and transmit. If you need to adjust for a station that is not exactly on your frequency - i.e., the tone is not quite right - adjust with your RIT control. It has steps of 10 Hz, and you can do fine adjustments.
In fact, your DMX-40 or MMX decoder is only APPROXIMATELY 1300 Hz. It should be very close, but it can be 20-30 Hz off in either direction, and can drift as the temperature changes inside the decoder. So a little experimenting over time, you may discover that the correct setting for your PreppComm decoder is actually 0.42 or 0.39, for example. However, each station you are communicating with, depending on how close they are transmitting to your frequency, may require you to make a fine adjustment for best results. This should not be more than 50-60 Hz, for a sloppy operator. Always return to the default best setting between QSO’s.
Other Transceivers
Other transceiver owners, you will have to translate these instructions for your unit. Older transceivers may not have an RIT control, or even no adjustment of tone, so there may be situations where your transceiver cannot operate with 1300 Hz tones. Filter adjustment is also a potential issue. The Icom 7300 and other similar modern transceivers all have these kinds of settings, often called by a different name.
Hi Eric,
That’s similar to what I do on my IC-705, except I’ve set a tone of 650 and a RIT of 650 with FIL1 spreading 300-1650 (soft). It’s been working well. Your example would be a great addition in the QUICK START GUIDE.
In there though, I seem to recall you recommend SSB Mode.
Regards, Tom.